Spreadsheet Input
Process transactions efficiently using a grid-style interface with Spreadsheet Input. You can customize exactly which Employee Masterfile details appear automatically (like names or departments) and which specific transaction codes you want to process side-by-side. Once the data is entered, it is posted directly to the Payslip Input, and your custom spreadsheet format can be saved and reused every period.
Setup and Processing Steps
Step 1: Spreadsheet Formats
- Navigate to the Process - Spreadsheet Input screen.
- Press 'Insert' to create and name a new spreadsheet format.
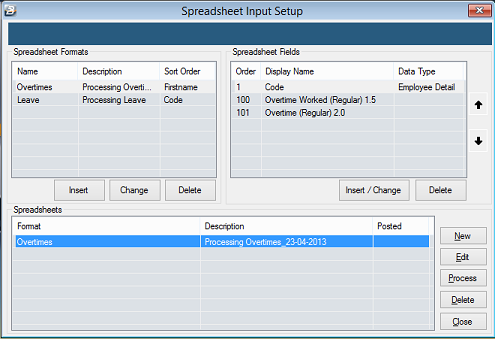
Step 2: Spreadsheet Fields
- When a format is created, the 'Employee Code' is automatically inserted as the first column heading (this can be deleted if not required).
- Press 'Insert' to add more columns to your spreadsheet grid.
- Select whether the new column should display 'Employee data' (read-only information pulled from the masterfile, like First Name) or 'Transaction Data' (an active transaction code you need to input, like Overtime or Bonus).
Step 3: Process and Post
- Press the 'Process' button to load your created spreadsheet format.
- Enter the required transaction amounts into the grid for the relevant employees.
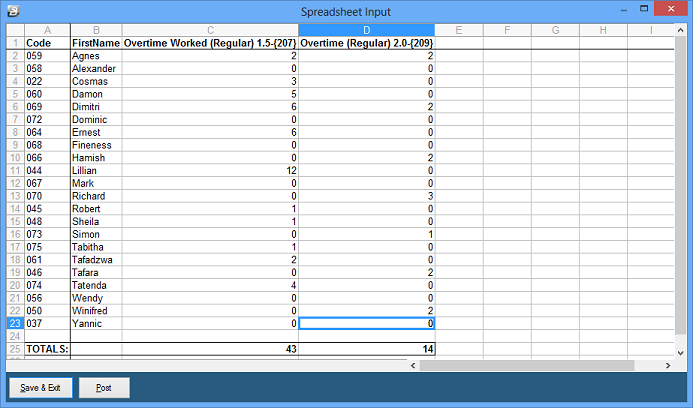
- When all data has been entered, press the 'Post' button to update the amounts directly to the employees' Payslip Input screens.
- Note: Spreadsheet data can be modified at any time, even after being posted. If you make a correction and press 'Post' again, the updated data will simply override the previous entry.
Was this page helpful?