History Data Maintenance
History Data holds the transactions and cumulative balances processed in prior periods for each employee. You'll typically work with it in three situations:
- Implementing a new payroll — bringing in prior-period balances from another system so FDS tax is calculated correctly.
- Correcting a prior period — e.g. a ZIMRA audit requires an adjustment, or pay was processed outside the payroll and needs to be reflected in history.
- Cleaning up old data
There are three tools under Data → History Data: Import, Maintenance, and Deletion (by Period or by Year).
Importing History Data
When bringing in bulk historic balances (for example, when implementing Belina Payroll and migrating prior-period data from another system), the fastest route is importing from Excel rather than capturing transactions one by one.
Use History Maintenance instead when you only need to adjust, insert, or delete a handful of transactions for specific employees.
Adjusting a Prior Period (History Maintenance)
History Maintenance is used to amend, add, or delete transactions in a period that has already been processed. This is a sensitive area — access is restricted to authorized personnel and requires an administrator username and password.
View written instructions
Take a backup first
Editing history directly affects the History file and indirectly affects other files (such as year-to-date balances). Take a backup before making any changes, so you can restore if needed.
Steps
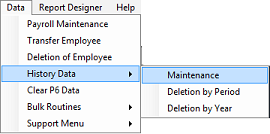
- Go to Data → History Data → Maintenance.
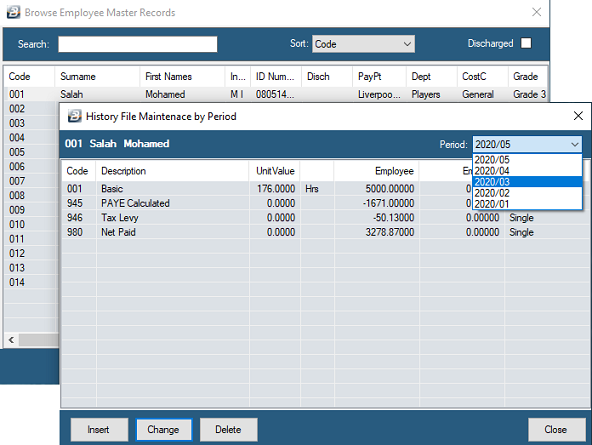
- Enter your administrator username and password, then select the employee whose information needs to change.
- Use the drop-down to select the historic period that needs adjusting. The transactions actually processed in that period are displayed.
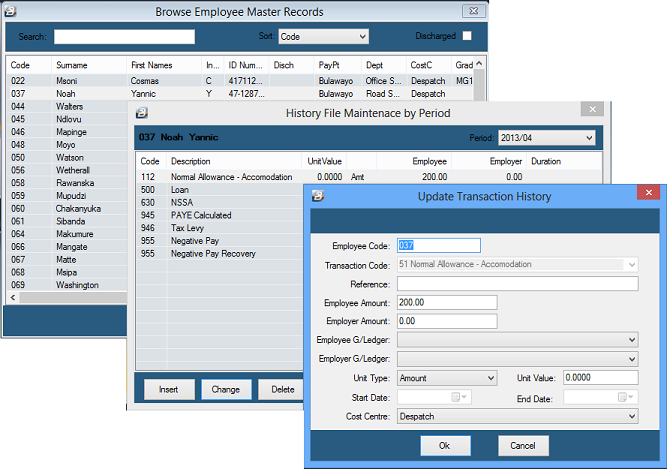
- To insert a transaction — click Insert and select the transaction code from the list. Deductions need a minus sign on both the employee and employer amounts.
- To change a transaction — highlight the transaction code and press Enter.
- To delete a transaction — highlight the transaction code and press Delete.
- Click OK to save the change, then Close to move to the next employee if needed.
- Unlike live processing, History Maintenance does not recalculate Net Paid automatically — you must calculate and enter it manually so the journal balances.
- Once all adjustments are done, exit the Data menu.
- Run the FDS Build Procedure to update the Year-to-Date Balance File with your changes.
FDS Build Procedure
Use the FDS Build Feature when:
- data has been imported into the system.
- there have been history adjustments.
The FDS build will re-build the cumulative tax figures for FDS.
- Go to the 'Data', then 'Support Menu', then 'FDS Build' menu options
- A warning displays. Press 'Yes' to continue

- Go to View → Period Journal, select the transaction codes, and confirm the journal balances.
Deleting History Data
Use this when you need to remove detailed history you no longer require. In both cases, the P6 information is retained regardless of whether the underlying detail is deleted.
Delete by Period
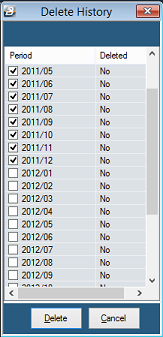
- Go to Data → History Data → Deletion by Period.
- Tick each period you want to delete.
- Click Delete.
- Deleted periods are marked Yes under the Deleted column.
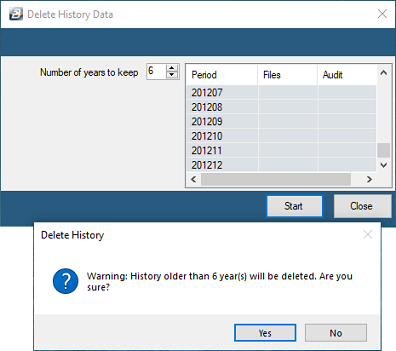
Delete by Year
- Go to Data → History Data → Deletion by Year.
- Scroll to set the number of years to keep.
- Click Start.
Was this page helpful?